To get started you need to have a horse to look at. Any horse will do. This is a quarter horse. You need to ensure that what you're looking at is a proper conformation photograph. The horse needs to be photographed side view, from the middle both vertically and horizontally, with the head/neck at wither level or above, and with the near (the side closest to you) cannon bones (lower legs) as close to vertical as possible. The horse needs to have the hooves showing, if possible, and be on FLAT ground.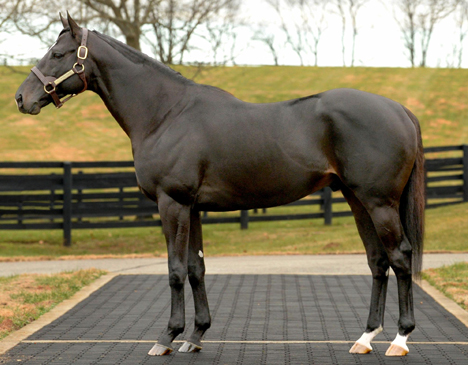
Now the first step is to mentally strip away all of the flesh, fat, muscle, and tissue, essentially leaving a skeleton.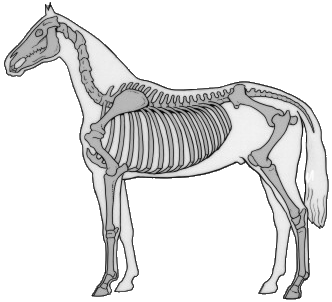
Once that is done you can start by learning the parts of the skeleton and the horse. Here is a good link to the names of the bones, parts, and skeletal anatomy: Here
Once you know the points/parts of the horse and its skeleton you can start to learn the simple assessment points that are usually the first things considered and looked at when judging a horse's conformation:
These are what are assessed first, the stand-out points. These points are used to draw the imaginary lines to show the angles of the shoulder, hip, topline, underline, straightness of the legs, etc.
Once you are familiar with the main assessment points you can move on the the secondary points: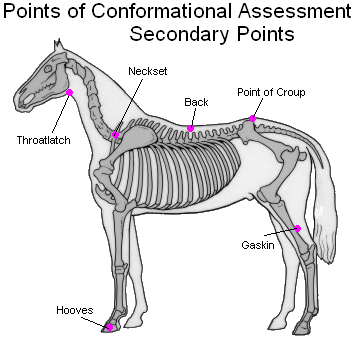
These points are the secondary things that are most often looked at when assessing a horse. While they are not used for drawing imaginary lines or angles, they are used for checking levelness of spine, throatlatch cleanness, gaskin coupling, the set of the neck, and the hooves of the horse.
Once you know all of the assessment points of the horse's skeleton you're ready to move on to learning how to draw lines, find angles, and assess the overall horse.
______________________________________________________________
OTHER:
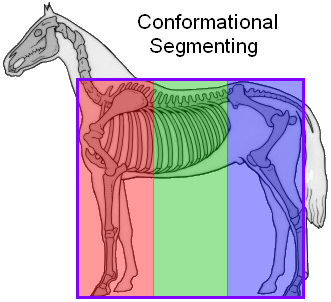
Horses' bodies should also be broken down into three segments. Each should ideally be 1/3 of the horse's body dimensions. None should be larger/longer than the others.